Install and configure Thunderbird: Difference between revisions
No edit summary |
No edit summary |
||
| Line 186: | Line 186: | ||
[[File:Enable_menubar.png|thumb|center|Enable the menu bar]] | [[File:Enable_menubar.png|thumb|center|Enable the menu bar]] | ||
And finally, Your email account configuration has been completed!... ;) | |||
Revision as of 16:53, 23 April 2017
Sheela Raj
Group : Cyber Security Engineering (C21)
Subject : Authentication & Authorization.
Introduction
In this article, we will cover how to Install and configure Thunderbird on both windows and Ubuntu.
Thunderbird
- Thunderbird is a free, open source, cross-platform email.
- Thunderbird can manage multiple email, newsgroup, and news feed accounts and supports multiple identities within accounts.
- Features such as quick search, saved search folders, advanced message filtering, message grouping, and labels help manage and find messages.
- On Linux-based systems, system mail accounts are supported.
- Basically it is a local (rather than a browser or web-based) email application that is easy-to-use.
Information about Thunderbird
Who makes Thunderbird
- Thunderbird is developed, tested, translated and supported by the folks at Mozilla Corporation and by a group of dedicated volunteers.
Is Thunderbird available for my platform?
- Probably Windows, Mac and Linux are available from the download page.
- For other operating systems,you can build Thunderbird from the source code.
What is my Thunderbird email?
- Thunderbird is an email application, so it does not provide email addresses.
- But It can be used with any existing email address to send, receive, sort and search your email messages.
Where is my personal information stored?
- Thunderbird stores your personal stuff(such as my messages, passwords, account information, etc) on your local drive.
- If you are using the IMAP protocol for accessing messages, your messages will also store on your email server.
Installation
In this part we will see how to install Thunderbird on both windows and Ubuntu.
Before we start
- Before installing Thunderbird, Make sure that your computer meets the System Requirements.
- You can check the System Requirements in this Thunderbird system requirements guide.
Note: The images used in this guide is just for example. Don't configure as it is in the images.
Installing Thunderbird on Windows
Step 1
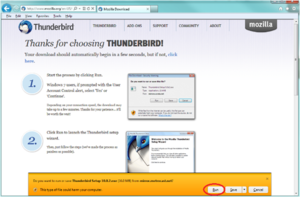
- Now visit the Thunderbird download page in any browser.
- The page will automatically recommend the best version(s) of Thunderbird for you.

Step 2
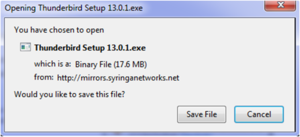
- Depending on your web browser, you may be presented with a run or save file option.
- If you are asked to save the file, save it to a location on your computer where you can find and open the file later.
- Alternatively, if you are presented with a run option, choose to run the downloaded file automatically.
Step 3
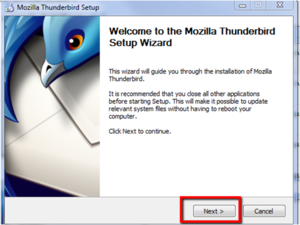
- Once you have run or saved , it will prompt you to the welcome screen.
- Click next on it, to continue.
Step 4
- So after step 3 you are successfully downloaded the Thunderbird.
- Now you can view the Thunderbird icon on your computer.

So Installing Thunderbird on windows is done.
Now lets see how to install Thunderbird on Ubuntu/Linux.
Installing Thunderbird on Ubuntu
Before You Begin
Check your current Ubuntu version & Upgrade
You can check your current Ubuntu version by the following command:
lsb_release -a
If your machine is already running Ubuntu 16.04.1 LTS or higher than that, There is no need for you to upgrade the OS.
Otherwise you need to upgrade the OS by the following command:
sudo apt-get update && sudo apt-get upgrade
Note:
This article is written for a non-root user. Commands that require elevated privileges are prefixed with sudo. If you’re not familiar with the sudo command, you can check the Users and Groups guide.
Lets start to install on Ubuntu
Step 1:
To install Thunderbird from the default system repositories issue:
sudo apt-get install thunderbird
Step 2:
Installing from default repositories will give you older version of Thunderbird. If you want to install most recent version of Mozilla Thunderbird, you can use the PPA maintained by the Mozilla team.
Use CTRL + ALT + T from the desktop to open terminal and add the Thunderbird repository under Ubuntu and its derivatives.
sudo add-apt-repository ppa:ubuntu-mozilla-security/ppa
Step 3:
Next, update the system software packages using update command.
sudo apt-get update
Step 4:
Once you’ve updated the system, install it using the following command.
sudo apt-get install thunderbird
And now the Thunderbird is installed on your Ubuntu machine.
Now we can step into the configuration part of the Thunderbird.
Configuration
So once your Thunderbird is installed on your machine, Open the Thunderbird and start to configure it by using following steps.
Step 1:
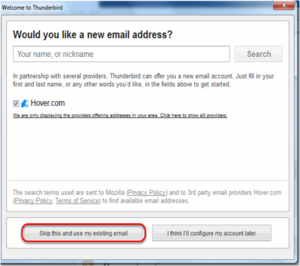
Once you open the Thunderbird, you can see the Welcome screen, where you can choose/select you email.
To choose your existing email Click on the Skip this and use my existing email button.
Step 2:
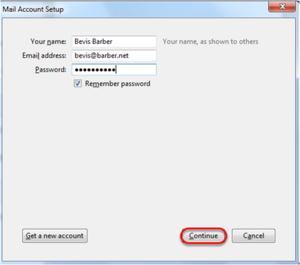
Then, Thunderbird will automatically present you with the Mail Account Setup window.
There your email account needs to be configured.
Type in your name as you wish it to appear on your sent email messages, your email address, and your password.
Click Continue.
Step 3:
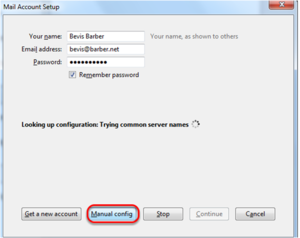
Now Thunderbird will attempt, and likely fail, to configure your email settings automatically.
Click on the Manual Config button to skip this process, and to configure manually.
Step 4:
Now, The Thunderbird will connect to the email server and will start downloading your email messages and folders.
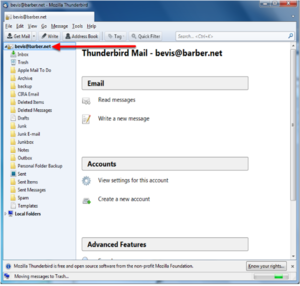
And finally the email account is configured.
Step 5:
May be sometimes, After downloading Thunderbird, the Menu Bar may not be displayed by default.
In order to show the menu bar you must Right Click in the blank space at the top of the program and check the option for Menu Bar.
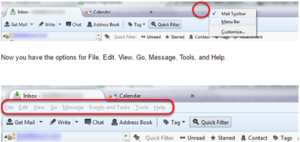
And finally, Your email account configuration has been completed!... ;)