Tulemüüri graafilise liidesega: Difference between revisions
| Line 42: | Line 42: | ||
[[Image:002-installation_media.png]] | [[Image:002-installation_media.png]] | ||
Järgmisena valige võrgukaardi draiverid, seda saab valida käsitsi või lasta automaatselt need | Järgmisena valige võrgukaardi draiverid, seda saab valida käsitsi või lasta automaatselt need paika panna | ||
Sisestage IP aadress mida tahate näha rohelise sektsiooni jaoks | Sisestage IP aadress mida tahate näha rohelise sektsiooni jaoks | ||
[[Image:005-green_ip.png]] | [[Image:005-green_ip.png]] | ||
5. Type in the IP address that you want for the Green interface. This will also set up the DHCP address space for the Green interface. Once you save the IP, IPCop will tell you that it was successfully installed. Click OK one more time to continue. | |||
6. Select your keyboard layout, timezone, and then enter the hostname and domain name for the firewall. | |||
7. If for some odd reason you are using ISDN, you can configure it here. Otherwise, just select Disable ISDN. | |||
8. Now to set up your network. Select ‘Network Configuration Type’ and pick what kind of network you want to set up. For a simple two NIC just select Green+Red if you are using broadband. | |||
9. Select ‘Drivers and Card Assignments’ to set up the new Red card. Confirm that you want to change the settings, and it should see that there is an unallocated NIC. Assign it to Red. | |||
10. Click on ‘Address Settings’, and then the Red interface. Select the type of internet connection you have (Static if your ISP gives you a static IP, DHCP for cable or Embarq DSL, and PPPoE for other DSL providers normally). | |||
11. If you want to set up DHCP on the Green network, go down and select ‘DHCP Server Configuration’. Fill in the settings that you would like to use. | |||
12. Now to set all the passwords for the system. You will set up root (physical and ssh access to the box), admin (web interface user) and backup (backup userver). Once you have those typed in, the set up is complete and the box will reboot. | |||
To access your new firewall, just go to http://<green address you set up>:81 . From that point you can play around and go from there. | |||
=Seadistamine= | =Seadistamine= | ||
[[Category:IT infrastruktuuri teenused]] | [[Category:IT infrastruktuuri teenused]] | ||
Revision as of 11:11, 10 January 2010
Tulemüür graafilise liidesega
Autor
Alvar Unuks AK32 aunuks (at) itcollege.ee
Versioon
1.4.19/1.4.20
Sissejuhatus
Mis asi on tulemüür
Mis asi on IPCop ja mida sellega teha saab
IPCop tulemüür on Debian Linuxi tulemüüri distributsioon. See on mõeldud kodukasutajatele ja SOHO kasutajatele. IPCopi web kasutaja liides on väga kasutaja sõbralik ja teeb kasutamise lihtsaks.
Vana info IPCopi kohta voib leida siit [1]
Erinevad sektsioonid
IPCop lubab sul jagada oma võrk erinevateks sektsioonideks roheline -usaldusväärne sisevõrk oranz - DMZ punane - internet sinine - WIFI
Mida on plaanis teha
Eeldused / nõuded
Nõuded riistavarale
min. 386 Protsessor, 32MB RAM, 300MB kõvaketas ja 2 võrgukaarti
Paigaldamine ja häälestamine
Allalaadimine
IPCopi saab allalaadida [2]
Tarkvara paigaldamine
Esimese asjana peaks IPCopi laadima alla ISO image, kirjutama plaadile kasutades oma kirjutamise tarkvara ja sisestama plaadi arvutisse millega plaanite tulemüüri pakkumist. Valige BIOSist, et arvuti boodiks esimesena CD/DVD pealt
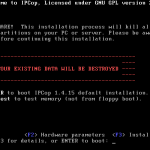
Esmane ekraanipilt on selline kui masin hakkab bootima, vajutage <Enter>
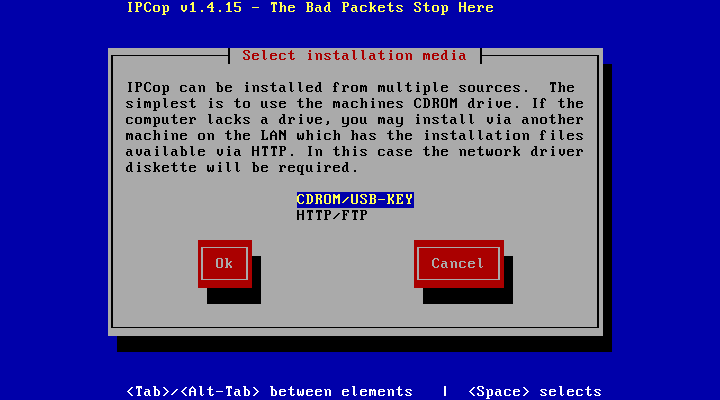
Järgmiseks valige keel ja boot meedia
Järgmisena valige võrgukaardi draiverid, seda saab valida käsitsi või lasta automaatselt need paika panna
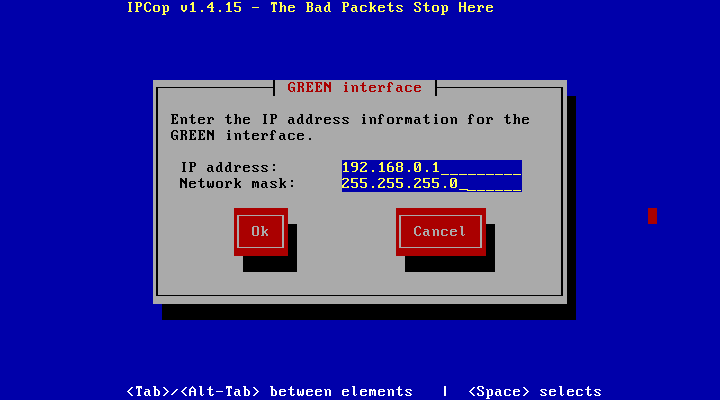
Sisestage IP aadress mida tahate näha rohelise sektsiooni jaoks
5. Type in the IP address that you want for the Green interface. This will also set up the DHCP address space for the Green interface. Once you save the IP, IPCop will tell you that it was successfully installed. Click OK one more time to continue.
6. Select your keyboard layout, timezone, and then enter the hostname and domain name for the firewall.
7. If for some odd reason you are using ISDN, you can configure it here. Otherwise, just select Disable ISDN.
8. Now to set up your network. Select ‘Network Configuration Type’ and pick what kind of network you want to set up. For a simple two NIC just select Green+Red if you are using broadband.
9. Select ‘Drivers and Card Assignments’ to set up the new Red card. Confirm that you want to change the settings, and it should see that there is an unallocated NIC. Assign it to Red.
10. Click on ‘Address Settings’, and then the Red interface. Select the type of internet connection you have (Static if your ISP gives you a static IP, DHCP for cable or Embarq DSL, and PPPoE for other DSL providers normally).
11. If you want to set up DHCP on the Green network, go down and select ‘DHCP Server Configuration’. Fill in the settings that you would like to use.
12. Now to set all the passwords for the system. You will set up root (physical and ssh access to the box), admin (web interface user) and backup (backup userver). Once you have those typed in, the set up is complete and the box will reboot.
To access your new firewall, just go to http://<green address you set up>:81 . From that point you can play around and go from there.


